
Is your home’s exterior trim just a decorative accent, or is it actually the first line of defense against the relentless Washington rain? Many homeowners see peeling paint on their fascia boards or window sills and worry it’s just the start of a much bigger problem. If you’re looking for professional exterior trim painting Vancouver WA, you already know those small details are often the most vulnerable. It’s frustrating to see your home’s crisp edges start to flake, especially when those high peaks are so hard to reach safely.
We believe that maintaining your home should be exciting, not overwhelming. This guide explains how a fresh, professional seal protects your property from the unique moisture challenges of the Pacific Northwest. You’ll learn how the right paint choices can prevent wood rot and mold while making your siding colors truly pop. We’ll walk through the best techniques for a long-lasting finish and show you how to achieve that clean, polished look that provides lasting peace of mind. Let’s explore how to keep the “envelope” of your home sealed and beautiful for years to come.
Key Takeaways
- Understand why your trim acts as the vital seal for your home’s structural joints and how it prevents moisture from creeping into your walls.
- Discover why specific high-gloss finishes are essential for shedding the heavy Pacific Northwest rain more effectively than standard wall paints.
- Learn the true cost of DIY projects and why professional exterior trim painting Vancouver WA saves you time while ensuring safety on those hard-to-reach fascia boards.
- See how a detailed preparation process, including bio-safe cleaning and precision sanding, creates a mechanical bond that lasts for years.
- Explore the top trim color trends for 2026 to modernize your home’s look and boost its overall curb appeal.
Why Exterior Trim Painting is Critical for Vancouver, WA Homes
Have you ever wondered why your trim starts peeling long before your siding does? In the Pacific Northwest, trim isn’t just for show. It acts as the critical seal for your home’s structural joints. Think of your fascia, soffits, window casings, and door frames as the protective “seams” of your house. When you invest in exterior trim painting Vancouver WA, you aren’t just buying a color change. You’re sealing the envelope of your home against over 40 inches of annual rainfall that targets these vulnerable edges first.
Why is trim more at risk than your siding? Siding is designed to shed water downward in large sheets. Trim, however, sits at the intersections where your roof meets your walls and where your windows meet your siding. These joints are the most common entry points for moisture. Without a fresh, flexible coat of paint, the wood begins to absorb water, leading to the dreaded dry rot that plagues so many homes in our community. Catching these issues early is the key to avoiding structural repairs that can cost thousands of dollars.
The Anatomy of Trim: Fascia and Soffits
Fascia boards are the long, horizontal boards that run along your roofline. They carry the weight of your gutters, which means they are constantly exposed to heavy runoff and wind-driven rain. If the paint fails here, water doesn’t just sit on the surface. It “wicks” up into the wood fibers from the bottom edge. This is why we pay special attention to painting the underside of the fascia boards. Your soffits, located right underneath, also need a protective coating. Proper paint ensures they stay dry while allowing for the ventilation your attic needs to prevent mold growth during our damp winter months.
Window and Door Casings: Preventing Interior Leaks
Why do window sills often rot before anything else? It’s usually because the protective coating has cracked, allowing water to pool and seep behind your siding. Understanding the basics of paint helps explain why this happens. The binders that hold paint together eventually break down under UV and moisture stress, leaving the wood exposed. Once that seal is gone, water can travel into your wall cavities, leading to interior leaks and hidden mold. Keep an eye out for hairline cracks in the corners or a chalky texture on the wood. These are the first signs that your home’s “envelope” is starting to fail and needs professional attention.
Choosing the Right Materials for the Pacific Northwest Climate
Why can’t you just use the same paint for everything? Standard wall paint is often too porous for the high-contact areas of your home. When performing exterior trim painting Vancouver WA, we select products specifically designed for horizontal surfaces and sharp edges. These areas experience more standing water and physical wear. High-gloss and semi-gloss finishes aren’t just about the shine. They provide a harder, slicker surface that sheds water much faster than flat or satin finishes.
Choosing between acrylic latex and hybrid alkyd paints is a common point of indecision for homeowners. Each has its own role in the PNW:
- Acrylic Latex: Stays flexible to handle wood expansion during wet winters.
- Hybrid Alkyds: Provides a hard, durable finish that resists scuffs and dirt.
- High-Build Primers: Fills the wood grain to prevent the “thirsty” look of old trim.
This technical choice is a major factor in the DIY vs. professional painting debate. Pros know exactly which resin will bond best to your specific substrate. Using the right primer ensures that the paint doesn’t just sit on top, but actually anchors into the wood for a long-lasting seal.
Caulking: The Secret to a Waterproof Trim Job
Have you noticed small gaps where your window trim meets your siding? Those gaps are invitations for moisture and local insects to nest inside your walls. We use high-stretch elastomeric caulk because it can expand and contract up to 50% without cracking. This is mandatory for the temperature swings we see in Vancouver and Battle Ground. Sealing every joint creates a truly waterproof barrier. If you’re unsure if your current seals are holding up, you can always ask a residential painter to inspect the “envelope” of your home.
UV Resistance in the PNW Summer
Don’t let our cloudy winters fool you. Our brief summers can be incredibly intense. UV rays break down the chemical bonds in paint, causing it to chalk and fade. This is especially true for the trending dark trim colors like charcoal or navy. These shades absorb more heat, which can cause the wood underneath to warp if the paint doesn’t have specialized resins. High-grade paints used for exterior trim painting Vancouver WA include UV inhibitors that keep your colors vibrant and your wood protected for years longer than budget alternatives.
Professional vs. DIY Exterior Trim Painting: What is the Real Cost?
Thinking about tackling your trim this weekend? It’s a common thought for many Vancouver homeowners looking to save a few dollars. But when you look at the big picture, the “savings” of DIY often disappear into equipment costs and lost time. For a high-quality exterior trim painting Vancouver WA project, you aren’t just paying for paint. You’re paying for the specialized gear and expertise required to do the job right the first time. Have you priced out a 28-foot extension ladder or a high-pressure sprayer lately? These aren’t standard garage tools. Beyond the gear, trim work is easily the most time-consuming part of exterior house painting. While siding goes fast with a sprayer, trim requires hours of meticulous hand-brushing.
There’s also the safety factor to consider. Do you feel comfortable balancing on a ladder to reach those high fascia boards and gables? Falling is a real risk that isn’t worth the trade-off. Professionals use safety harnesses and stabilized equipment to reach those peaks safely. When you hire an expert, you’re also ensuring the job lasts longer. A professional application can extend the time between repaints by several years, which saves you more money in the long run than any DIY weekend ever could.
Precision and Detail: The Skill Gap
Can you get those perfectly straight lines where the trim meets the siding? It’s harder than it looks. Most DIYers rely heavily on masking tape, but tape can bleed or pull off fresh paint. We prefer “cutting in” by hand. This technique creates a cleaner look and a more durable bond. We also know how to paint window casings without sealing the window shut. There is a specific technique to ensure moving parts stay functional while remaining fully protected from the rain. These small details make the difference between a house that looks “painted” and a house that looks “restored.”
The Value of a Licensed and Insured Contractor
Why does insurance matter? Hiring a licensed and insured painting contractor protects you from liability if an accident happens on your property. It also gives you a warranty on both labor and materials. Perhaps most importantly, a pro knows how to spot the difference between surface mildew and deep-seated wood rot. A DIYer might just paint over the rot, which only hides the problem while the wood continues to soften underneath. We identify these issues early so they can be fixed properly before the first coat of paint ever touches the wood. This proactive approach gives you genuine peace of mind about your home’s structural health.
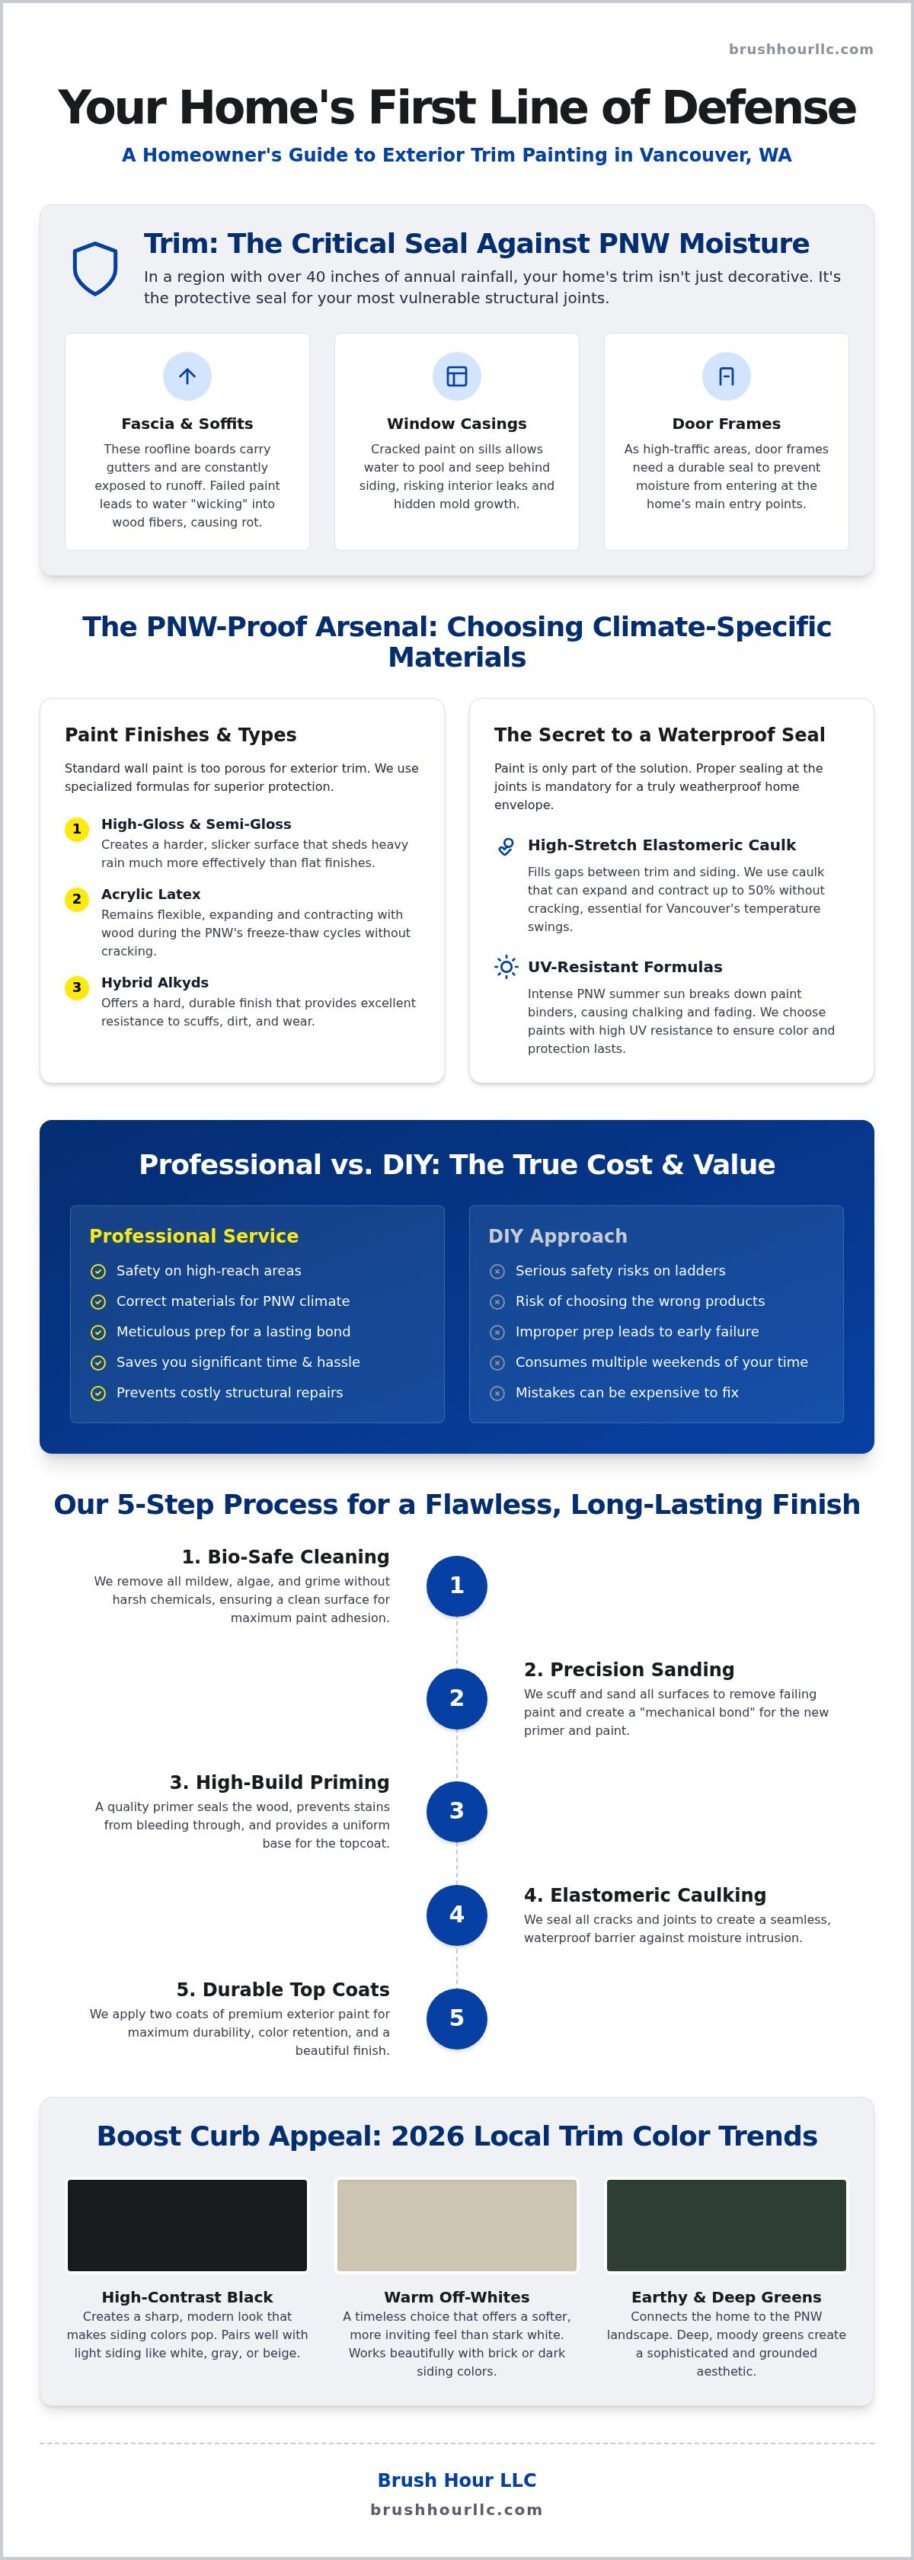
The Brush Hour LLC Trim Painting Process
How do we ensure your home’s details stay crisp and protected in our damp climate? It isn’t just about the final color. It’s about a methodical, five-step system designed specifically for exterior trim painting Vancouver WA. We don’t skip steps. We don’t take shortcuts. We know how quickly the PNW weather can exploit a weak seal, so our process turns your home’s most vulnerable spots into its strongest defenses.
- Step 1: Bio-Safe Cleaning. We use specialized cleaners to kill mildew and algae spores that thrive in the shadows of your eaves.
- Step 2: Mechanical Bonding. We scrape away loose flakes and sand the edges to ensure the new paint has a textured surface to “grip.”
- Step 3: Moisture Verification. We never guess if wood is dry enough; we use digital meters to confirm it.
- Step 4: Sealing the Joints. High-stretch caulk and premium primers are applied to every bare spot and open seam.
- Step 5: Double Protection. We finish with two coats of high-grade paint to provide a thick, durable barrier.
Moisture Testing: The Vancouver Essential
For a successful bond, wood moisture content must be at or below 15% before any paint is applied. This single measurement is the difference between a job that lasts a decade and one that peels in a year. If we trap moisture behind a fresh coat of paint, it will eventually turn into steam during the summer and push the paint right off the wood. We use professional moisture meters to check multiple points on your fascia and window sills. This allows us to accurately find the “dry window” in the Clark County forecast. It ensures your investment doesn’t flake away by next spring.
Surface Preparation: Sanding and Scraping
Preparation is where the real work happens. If your home was built before 1978, we handle old paint layers with extreme care to keep your family safe and remain compliant with safety regulations. We focus on “feathering” the edges of old paint. We sand the transition between the bare wood and the old paint until it’s perfectly smooth. This prevents the new layer from peeling at the edges of the old one. We also take the time to clean the “jams” and “rabbets” of your windows. This ensures a smooth finish that looks great and allows your windows to open and close without sticking. If you’re ready for a process that prioritizes longevity, you can contact a house painter today to get started.
Maximizing Curb Appeal with Local Vancouver Trim Trends
Are you ready to see your home in a whole new light? Choosing the right colors for your exterior trim painting Vancouver WA project is about more than just personal preference. It’s about creating a cohesive look that fits our beautiful Pacific Northwest surroundings. In 2026, we are seeing a shift toward sophisticated, nature-inspired palettes in Vancouver and Battle Ground. These choices don’t just look great; they can actually make your home appear larger or more modern depending on how you balance the contrast between your trim and siding.
Coordinating your trim with your choice for residential painting near me is the secret to professional-grade curb appeal. In the Clark County market, first impressions are everything. A crisp, well-coordinated exterior can significantly boost your home’s resale value by signaling to buyers that the property has been meticulously maintained. Whether you want a bold statement or a subtle transition, the right trim color acts as the “frame” for your home’s architectural features.
The “Tricorn Black” and Modern Contrast Trend
Have you noticed the striking high-contrast homes in newer developments in Ridgefield and East Vancouver? The trend of using deep, saturated colors like Tricorn Black for trim is more popular than ever. This look creates a sharp, modern edge when paired with light gray or off-white siding. To keep it timeless, we recommend balancing these dark accents with neutral siding tones. It’s also important to consider your roof color and any stone accents. We help you choose a trim shade that ties all these elements together into one seamless, attractive package.
Get Started with Your Local Vancouver Experts
Are you feeling a bit overwhelmed by color swatches? Don’t worry, we are here to guide you through the process. When you schedule a free on-site trim assessment, we’ll walk around your property together. We’ll look for those vulnerable spots we discussed earlier, like peeling fascia or cracked window sills, while discussing which colors will best highlight your home’s character. During your Brush Hour LLC consultation, you’ll get clear answers and a methodical plan for your project. We want you to feel confident and excited about your home’s transformation. Contact Brush Hour LLC for a free quote! and let’s start protecting your home today.
Ready to Seal Your Home’s Future?
Your home’s trim is more than just a decorative border; it’s the essential seal that keeps the Pacific Northwest rain from reaching your structural skeleton. By choosing the right weather-resistant coatings and prioritizing precision prep work, you aren’t just improving aesthetics. You’re securing your investment against wood rot and mold. Why settle for peeling fascia when you can have a crisp, durable finish that lasts for years? Professional care ensures that even the hardest to reach peaks are sealed tight against moisture, protecting the “envelope” of your home from the inside out.
At Brush Hour LLC, we’ve been serving Vancouver and Battle Ground as a licensed and insured WA contractor since 2012. We specialize in high-quality exterior trim painting Vancouver WA that stands up to our unique climate. Our team uses professional moisture meters and premium resins to ensure every window sill and door frame is fully protected. Are you ready to see the difference professional craftsmanship makes? Get Your Free Vancouver Exterior Trim Quote Today! Let’s give your home the revitalization and peace of mind it deserves.
Frequently Asked Questions
How often should I paint the exterior trim on my Vancouver home?
Most Vancouver homes need their trim repainted every 5 to 8 years. While your siding might last longer, the trim is more exposed to moisture and UV rays. If you see hairline cracks or a chalky texture on your window sills, it’s time for a refresh. Regular maintenance prevents wood rot and keeps your home’s seal intact. Don’t wait for the paint to start flaking off before calling for an expert assessment.
Can you paint exterior trim in the winter in Washington?
It is generally not recommended to paint trim during our wet winters. We need the wood moisture content to be at 15% or lower for the paint to bond correctly. Most exterior paints also require temperatures to stay above 35 to 50 degrees Fahrenheit. While we occasionally find a dry window in the forecast, we usually schedule exterior trim painting Vancouver WA for the drier months between May and October for the best results.
What is the best paint finish for exterior trim in the PNW?
Semi-gloss or high-gloss finishes are the best choices for trim in the Pacific Northwest. These slicker surfaces shed rainwater much more effectively than flat or satin paints. They also provide a harder protective shell that resists dirt and mildew growth. Because trim is a high-contact area, a glossier finish makes it easier to clean. It also helps the architectural details of your home stand out beautifully against the flatter texture of your siding.
Do I need to sand my trim before painting it?
Yes, sanding is a critical step in our professional preparation process. It creates a “mechanical bond” by roughening the surface so the new paint can grip the wood. We also use sanding to feather the edges of any old, peeling paint. This ensures the final finish is smooth and won’t lift away later. Skipping this step often leads to premature peeling, especially on the exposed edges of fascia boards and window casings.
How much does it cost to paint exterior trim in Vancouver WA?
The cost of trim painting depends on several factors, including the size of your home and the current condition of the wood. Homes with multiple stories or intricate detail work naturally require more time and specialized safety equipment. We recommend scheduling a professional assessment to get an accurate quote. This allows us to identify any wood rot or preparation needs that might influence the total investment for your specific project and home.
What is the difference between fascia and soffit painting?
Fascia boards are the vertical surfaces that run along your roofline and support your gutters. They take the full force of the rain and wind. Soffits are the horizontal boards located underneath the roof overhang. While both require protection, fascia boards often need more frequent attention because they are more exposed to the elements. Painting both ensures your entire roofline is sealed against moisture. It also makes your home look uniform and polished from the street.
Can you paint over old, peeling trim paint?
You should never paint directly over peeling paint. The new layer will only be as strong as the old one underneath it. If the old paint is lifting, the new coat will peel off right along with it. We always scrape away loose flakes and sand the area before applying a high-build primer. This creates a stable surface for the exterior trim painting Vancouver WA. It ensures your new finish lasts for many years and stays protected.
How long does it take to paint the exterior trim of a house?
A typical trim project usually takes between 2 to 4 days to complete. The majority of this time is spent on preparation, including cleaning, scraping, and caulking. We take our time to ensure the wood is dry and the surfaces are perfectly prepped before we open a single can of paint. Once the prep work is finished, the actual application goes relatively quickly. The exact duration depends on the weather and your home’s detail complexity.