
Your home’s exterior trim isn’t just a decorative frame; it’s the vital seal that protects your entire structure from the relentless Pacific Northwest moisture. Have you noticed small flakes of paint on your fascia or cracks in the caulking? It’s natural to feel a bit of dread when you spot these signs. If you’re worried about hidden wood rot or picking the wrong products, you aren’t alone. You want a home that looks sharp, and getting the exterior trim painting right is the best way to ensure long-term protection.
We understand that hesitation. That’s why we’ve put together this professional-grade checklist for 2026. This guide will give you the confidence to handle your project with precision and ease. You’ll discover the essential steps to protect your investment, from identifying the latest earthy color trends to navigating important lead-safe practices for older homes. We’re going to walk through the exact process required to achieve a beautiful, lasting finish that makes your house the pride of the neighborhood.
Key Takeaways
- Learn why your trim is your home’s main defense against moisture and how it stops rot before it starts.
- Master the prep work with professional cleaning and scraping tips that make your finish last for years.
- Find out which modern acrylic paints and sheens work best for exterior trim painting in our damp climate.
- Get the timing right by learning how to work with the weather and avoid the pitfalls of direct sunlight.
- Know when to tackle the job yourself and when it’s better to call in a professional house painter.
Why Exterior Trim Painting is Your Home’s First Line of Defense
Think of your home’s trim as the protective seal on a high-end waterproof jacket. It isn’t just there for the looks; it serves a critical structural purpose. Your trim pieces cover the delicate joints where different building materials, like siding and window frames, meet. Without a solid coat of paint, these gaps become open invitations for moisture to seep into your wall cavities. High-quality exterior trim painting acts as a flexible moisture barrier, keeping the internal structure of your home dry and secure through every season.
The Aesthetic Impact of Professional Trim Work
Have you ever noticed a house that just looks “sharp”? That feeling usually comes from the contrast between the siding and the trim. Trim acts as the frame for your home’s architectural features, defining the lines of your windows, doors, and roof. A fresh coat of paint in a modern, earthy tone can completely revitalize your curb appeal without the cost of a full exterior repaint. A professional house painter focuses on achieving those crisp, clean lines that make a home look well-maintained and organized. It’s the difference between a house that looks tired and one that feels brand new.
Signs Your Trim is No Longer Protecting Your Home
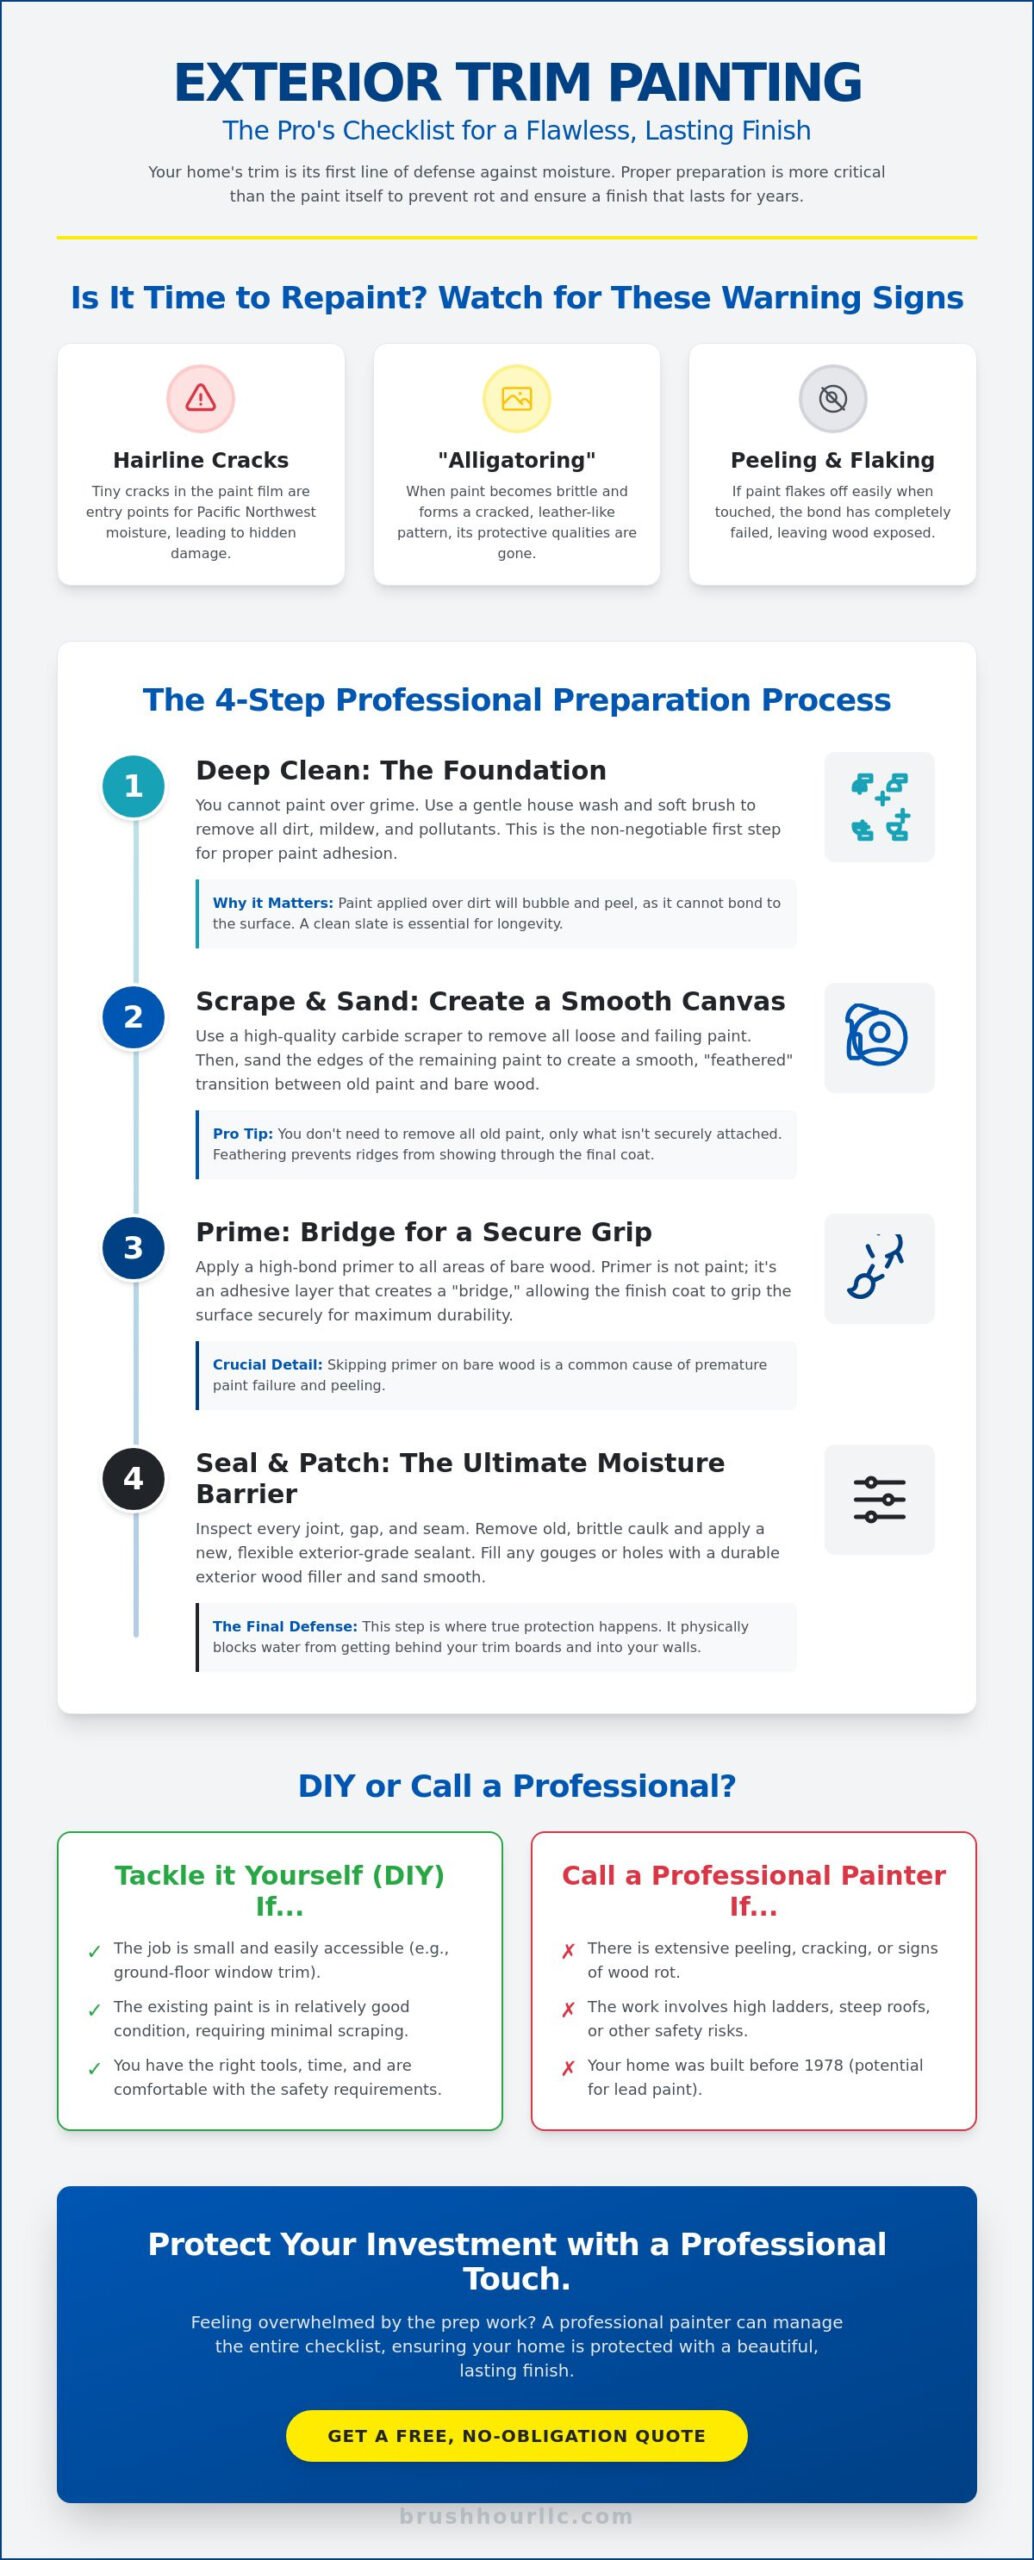
How do you know when it’s time to take action? You don’t have to wait for large chunks of wood to fall off. Start by looking for tiny hairline cracks in the paint film. These might seem small, but they are large enough for Pacific Northwest moisture to enter. You should also watch for “alligatoring,” which is when the paint becomes brittle and starts to look like cracked leather. If the paint flakes off when you touch it, the bond has failed completely. If you aren’t sure if your home is ready for a refresh, check out these 5 clear signs you need to repaint your house. Catching these issues early is the best way to keep your maintenance costs low and your home protection high.
The Ultimate Preparation Checklist for a Lasting Finish
Have you ever seen paint peel off in huge sheets just a year after a project? That usually happens because the surface wasn’t prepared correctly. For a successful exterior trim painting project, the prep work is actually more important than the paint itself. If you skip the foundation, even the most expensive topcoat will fail. We always recommend starting with a clean slate to ensure your hard work pays off.
Start with a deep clean. Many people make the mistake of just sanding and painting, but you must remove dirt, mildew, and airborne pollutants first. Use a gentle house wash solution and a soft brush. If you paint over grime, the new layer won’t bond. It’ll eventually bubble and peel. This is a common pitfall that DIYers often overlook, but it’s the secret to a professional-grade finish that stands up to the elements.
Once the trim is dry, it’s time to scrape. Use a high-quality carbide scraper to pull away any loose or failing paint. You don’t need to remove every bit of old paint; just the parts that aren’t sticking. Follow this up with sanding. This process, called “feathering,” smoothes the transition between bare wood and old paint so you don’t see ridges in the final finish. For detailed guidance on these techniques, the National Park Service provides excellent technical notes on Proper Painting and Surface Preparation. Finally, apply a high-bond primer to any bare wood. This creates a “bridge” that allows your finish coat to grip the surface securely.
The “Seal” Phase: Caulking and Patching
Many guides ignore this step, but caulking is where the real protection happens. Inspect every joint where your trim meets the siding. Are there gaps? Is the old caulk brittle? Remove the old stuff and apply a high-quality exterior-grade sealant. You want a product that remains flexible as your home expands and contracts with the weather. If you find gouges or woodpecker holes, fill them with a durable exterior wood filler and sand them flush. This step ensures that water can’t get behind your boards. If you’re feeling overwhelmed by the thought of climbing ladders and scraping fascia, a professional painting contractor can manage the entire checklist for you.
Masking and Protection
Don’t pick up a brush until your surroundings are safe. Protect your windows with painter’s plastic and high-quality tape. It’s much easier to tape a window now than it is to scrape dried paint off glass later. Cover your flower beds, bushes, and walkways with heavy-duty drop cloths. Proper masking might feel tedious, but it saves hours of stressful cleanup. It keeps your property looking organized and ensures that the only thing getting a fresh look is your home’s trim.
Choosing the Right Materials for Exterior Trim
Once your surfaces are prepped and primed, you face a big decision. Which paint will actually survive the next five to ten years? Don’t make the mistake of thinking any exterior paint will do the trick. Your trim experiences more stress than your siding because it sits at the joints of your home. Selecting the right products for exterior trim painting is about balancing aesthetics with rugged durability.
For homeowners in Vancouver, WA, 100% acrylic latex is the undisputed gold standard. It’s all about flexibility. Our weather swings from damp winters to dry, hot summers. This causes wood to expand and contract constantly. Modern acrylics act like a flexible skin that moves with the wood without cracking. While oil-based paints were popular decades ago, they tend to become brittle over time. This leads to the flaking and peeling we want to avoid. If you’re looking for a deeper dive into product selection, this exterior trim painting guide offers excellent insights into the latest industry standards.
Don’t forget your tools. You can buy the best paint in the world, but a cheap brush will leave you with ugly streaks and shedding bristles. Invest in a 2.5-inch angled sash brush. This is the professional’s choice for a reason. The angle allows you to cut into tight corners with precision. It ensures those crisp lines that make your home look its best. High-quality brushes also hold more paint, which means fewer trips to the bucket and a smoother application.
Paint Sheens: Function Over Fashion
Should you go shiny or matte? For trim, function usually dictates the fashion. Semi-gloss is the industry standard because it’s incredibly durable and easy to clean. Its slicker surface actually helps shed water and resist dirt buildup. Satin is a great alternative if your trim has some older character or minor dings. It hides imperfections better than semi-gloss while still providing a solid moisture barrier. We rarely recommend flat paint for trim. It’s too porous and tends to hold onto mildew and grime in our moist climate.
Weather-Resistant Coatings
The 2026 paint market offers some incredible technology. Look for coatings with high UV resistance. This is especially important if you’ve chosen the warm, earthy tones currently in style. These pigments can fade under direct sun without the right protection. Also, consider “breathable” formulas. These allow tiny amounts of trapped moisture to escape from the wood without blowing the paint off the surface. If you’re painting during the cooler spring or fall months, look for low-temperature formulas that can safely cure even when the thermometer dips below 50 degrees.
Execution: Painting Techniques and Timing
Are you ready to finally see that transformation? Once you have your materials, the success of your exterior trim painting project comes down to your rhythm and the weather. In our part of the country, you can’t just paint whenever the sun is out. You need a strategy to ensure the paint cures properly rather than just drying on the surface. Getting the timing right is the difference between a finish that lasts a decade and one that fails by next winter.
Always work from the top down. Start with your eaves and fascia boards before moving to window frames and door trim. Why does this matter? It allows you to catch any drips or splatters on the lower sections as you go. While you work, focus on maintaining a “wet edge.” This means you should always overlap your next stroke into paint that is still wet. If the previous section has already started to skin over, you’ll end up with visible lap marks that ruin the professional look you’re after.
You also need to “follow the sun” around your house. It might sound counterintuitive, but you should avoid painting in direct sunlight. If the surface is too hot, the paint will dry too fast. This prevents it from leveling out and bonding correctly. Instead, paint the sides of the house that are currently in the shade. This gives the coating the time it needs to settle into the wood grain for a smooth, durable finish.
The Vancouver Weather Window
Living in the Pacific Northwest means dealing with high humidity even on “dry” days. Moisture in the air can significantly slow down your dry times and interfere with paint adhesion. Ideally, you want a window of at least 24 hours of dry weather with humidity levels below 70 percent. Your “goldilocks” temperature range is between 50°F and 85°F. If it’s too cold, the paint won’t cure; if it’s too hot, it will become brittle. For more local climate advice, check out our guide on Exterior Siding Painting in Vancouver, WA.
Brush vs. Spray for Trim
Should you pull out the airless sprayer? For long, straight runs of fascia, a sprayer can save you hours. However, for detailed window trim and doors, a brush offers better control. Regardless of how you apply the paint, we always recommend the “back-brushing” technique. This involves running a brush over the wet paint immediately after spraying. It pushes the paint into the wood pores and creates a much stronger bond. If you want a flawlessly executed project without the stress of watching the forecast, contact a professional exterior painting expert today to get started.
When to DIY vs. Calling a Professional Painter
So, you’ve read the checklist and you’re ready to grab a brush. But is exterior trim painting a project you should really tackle on your own? It’s a question every homeowner asks eventually. While painting a guest bedroom is a fun weekend project, working on your home’s exterior is a different beast entirely. It requires a specific set of skills and, more importantly, the right equipment to do it safely. You have to decide if the time and risk are worth the potential savings.
First, take a look at your roofline. Does it require a 24-foot ladder or higher to reach the peaks? If the answer is yes, it’s time to call a professional. Working at those heights while trying to scrape and paint with precision is dangerous. Our Pacific Northwest terrain isn’t always flat either. Trying to stabilize a tall ladder on a sloped yard or a soggy lawn is a recipe for an accident. Professionals use specialized equipment like scaffolding or lifts to handle complex rooflines without the risk of a fall.
Next, evaluate the condition of the wood. If you find extensive wood rot during your inspection, a fresh coat of paint won’t solve the problem. Fixing rot requires carpentry skills to replace the boards before the painting even begins. A professional contractor can identify these structural issues early, ensuring your home is actually sealed rather than just covered up. Don’t underestimate the time commitment, either. Trim is the most detail-oriented part of any exterior project. It’s not just about the painting; it’s the hours of cleaning, scraping, and caulking we discussed earlier. If you have a busy schedule, a “quick” trim project can easily stretch into a month-long ordeal.
Safety First: The Risks of High-Reach Painting
Safety should always be your top priority. Professional painters carry the necessary insurance and licenses to protect both their workers and your property. When you hire a licensed expert, you’re getting the peace of mind that comes with professional-grade safety protocols. We have the training to navigate steep pitches and uneven ground safely. Investing in a pro means you don’t have to spend your weekend balanced on a literal ledge.
The Brush Hour Difference in Vancouver and Battle Ground
We pride ourselves on being more than just a painting service; we are your local home maintenance partners. Our meticulous prep process ensures your trim stays sealed against the rain for years to come. We have deep experience choosing the best products for the specific humidity and temperature swings we see here in Vancouver and Battle Ground. We stand behind our work with a commitment to quality that DIY projects simply can’t match. Are you ready to see your home transformed? Contact Brush Hour LLC for a professional trim assessment today and let us handle the hard work for you.
Secure Your Home’s Future Today
Your home’s trim does more than just look pretty; it’s the vital seal that keeps the Pacific Northwest rain where it belongs. By following a structured prep process and choosing high-quality, flexible materials, you can ensure your exterior trim painting project stands the test of time. Remember that the right prep work and a keen eye on the weather are your best tools for preventing wood rot and maintaining that sharp curb appeal.
Does the thought of climbing tall ladders or scraping fascia boards feel overwhelming? You don’t have to do it alone. As a licensed and insured painting contractor in Washington, we bring expert knowledge of PNW moisture protection and precise craftsmanship to every project. We’re here to take the stress out of home maintenance and give your house the polished, professional finish it deserves. Before you commit to a contractor, learn how to evaluate your options in our guide to choosing the best residential exterior painters in Vancouver WA. Get a Professional Quote for Your Exterior Trim Project and let’s start your home’s transformation together. You’ve worked hard on your home, and we’re here to help you protect it for years to come.
Frequently Asked Questions
How often should I paint my exterior trim in the Pacific Northwest?
You should aim to repaint your exterior trim every 5 to 7 years in our local climate. Trim boards take a much harder beating than your siding because they are located at the joints and corners where moisture likes to collect. Do you see any dulling of the color or small cracks in the finish? If so, it’s time to start your maintenance checklist before the underlying wood begins to soften or rot.
Do I need to prime my trim before painting if it is already painted?
You only need to apply primer if you have exposed bare wood or if you are switching between different types of paint, such as moving from old oil-based paint to a modern acrylic. Spot-priming bare areas is a critical step for ensuring the new topcoat sticks. If your existing paint is still well-bonded and in good condition, a thorough cleaning and light sanding are usually enough to prepare the surface for a fresh coat.
What is the best type of caulk for exterior trim painting?
A high-quality, paintable elastomeric sealant is the best choice for exterior trim painting. You want a product specifically designed for exterior use that remains flexible as your home expands and contracts with the changing seasons. Avoid cheap painters’ caulk that dries hard and brittle. A flexible sealant acts as a rubberized gasket that keeps water from sneaking behind your boards and causing hidden structural damage.
Can I paint my trim if the wood is slightly damp from the rain?
No, you must wait for the wood to be completely dry before you pick up a brush. Painting over damp wood traps moisture inside the grain, which will lead to bubbling and peeling within just a few months. Does the wood feel cool to the touch or look darker than usual? Give it at least 24 to 48 hours of dry weather to ensure the moisture levels are low enough for the paint to bond correctly.
Is it better to brush or spray exterior trim?
A combination of both techniques often yields the best results. Spraying is excellent for covering long, straight sections of fascia or soffits quickly and evenly. However, a brush is essential for detailed work around windows and doors where you need maximum precision. We always recommend back-brushing after spraying to push the paint deep into the wood pores for the strongest possible bond.
How much does professional exterior trim painting cost compared to DIY?
Professional costs primarily cover labor, which typically accounts for 60% to 85% of the total project budget. While a DIY project only requires you to pay for materials like paint and brushes, you also have to factor in the cost of your own time and the risk of ladder work. Hiring a residential exterior painter in Vancouver WA ensures the job is done with specialized equipment and includes a warranty that protects your investment for years to come.